Overview
This article details the best practices for configuring Exchange Web Services (EWS) OAuth support with GFI Archiver. Microsoft 365 has discontinued the Basic Authentication support for EWS and introduced OAuth 2.0 for authentication and authorization.
EWS OAuth authentication support for Microsoft 365 was introduced in GFI Archiver v15.1. The steps in this article assume that you are running GFI Archiver v15.1 or later. Please consider upgrading your GFI Archiver installation if you use an earlier version.
If you have already configured EWS OAuth and Archiver is not archiving the emails from the Journal Mailbox (it was working until recently), please review the article: Archiver not consuming emails from the journal mailbox on Exchange Online to troubleshoot further.
Performing the configuration as described in this article should mitigate the following errors:
Failed during: Testing connection

       Details: Could not perform test of connection. Details: The request failed with HTTP status 401: Unauthorized.
"MailServerWizard","ERROR:MSCreate_ERR: Requested finishing of steps (with error). Stopping on step: TestConnection. With error: Could not perform test of connection. Details: Type 'Microsoft.Identity.Client.MsalUiRequiredException' in Assembly 'Microsoft.Identity.Client, Version=4.18.0.0, Culture=neutral, PublicKeyToken=0a729f4ee981c7ae' is not marked as serializable."
The most common reasons for the above errors are when the password format is incorrect, allowPublicClient is not true, and delegated permission EWS.AccessAsUser.All has not been granted admin consent.
Important Note: Please ensure that MFA is disabled on the Journal Mailbox. GFI Archiver does not support connection to an MFA-enabled Journal Mailbox. Please ensure that the Journal Mailbox is also excluded from the conditional policies. If you are using a third party MFA service, you will need to change the Journal Mailbox from your federated domain to your onmicrosoft.com domain e.g journal@<yourdomain>.onmicrosoft.com
IMPORTANT NOTE: because of the ApplicationImpersonation RBAC Role Deprecation in Exchange Online | Microsoft Community Hub, if on Archiver version 15.8, please also consider the steps in the article: Registering Archiver in Azure Portal
Solution
- Step 1: Register GFI Archiver as an OAuth client app
- Step 2: Configure API permissions
- Step 3: Set the OAuth client to public
- Step 4: Configure TLS on Archiver Server
- Step 5: Configure the Journaling Mailbox in Archiver
Step 1: Register GFI Archiver as an OAuth client app
To use OAuth, an application must have an application ID issued by Azure Active Directory. This tutorial assumes that the application is a console application, so you need to register your application as a public client with Azure Active Directory.
Please follow the steps in Registering Archiver in Azure Portal to register GFI Archiver as an OAuth client app successfully. (Failure to follow these steps carefully can cause errors later in the process.)
Legacy Process-No longer valid:
- Open a browser, navigate to the Azure Active Directory admin center, and log in using an admin account.
- Select Azure Active Directory in the left-hand navigation, then select App registrations under Manage.
- Select New registration.
-
On the Register an application page, set the values as follows
- Set Name to a friendly name for your app, such as GFI Archiver.
- Set Supported account types to the choice that makes sense for your use case.
- For Redirect URI (optional), change the dropdown to Public client/native (mobile & desktop) and set the value to
https://login.microsoftonline.com/common/oauth2/nativeclient.
- Choose Register. On the next page, copy the value of the Application (client) ID and save it; you will need it later in step 5 while configuring EWS passwords.
Step 2: Configure API permissions
- Go to Azure Active Directory > App registrations and select the app registration we created in the previous step.
- Under Manage, select API Permissions.
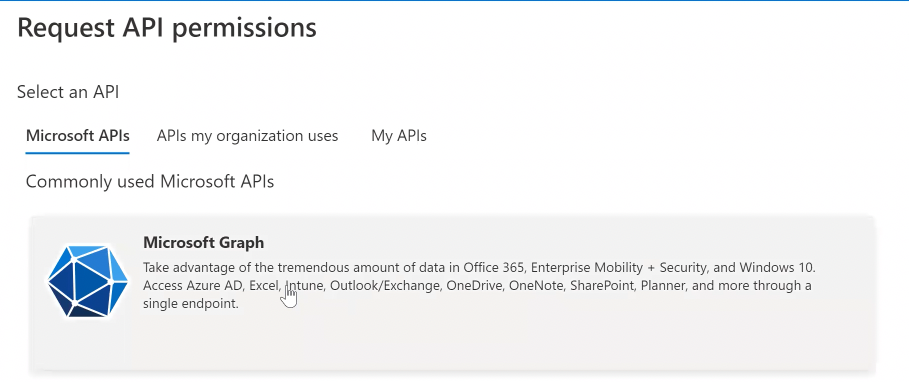
- Select Add a permission, and from the Request API permissions page, select Microsoft Graph.
- Select Delegated permissions, then EWS.AccessAsUser.All under EWS, and click on Add permissions.
- Back on the API permissions tab, click the Grant admin consent from [Organization/Tenant] option at the top of the list. The green checkmark appears if successful.

Step 3: Set the OAuth client to public
- Locate the Azure App manifest for your registered application from step 1.
- Ensure that the value of
allowPublicClientis set totruein the manifest. If it is set to anything else, please change it totrue.
Step 4: Configure TLS on Archiver Server
On the Archiver server, run the following PowerShell commands to mitigate any potential TLS issues.
New-ItemProperty -path 'HKLM:\SOFTWARE\Microsoft\.NetFramework\v4.0.30319' -name 'SchUseStrongCrypto' -value '1' -PropertyType 'DWord' -Force | Out-Null

New-ItemProperty -path 'HKLM:\SOFTWARE\WOW6432Node\Microsoft\.NetFramework\v4.0.30319' -name 'SchUseStrongCrypto' -value '1' -PropertyType 'DWord' -Force | Out-Null

New-ItemProperty -path 'HKLM:\SOFTWARE\Microsoft\.NetFramework\v4.0.30319' -name 'SystemDefaultTlsVersions' -value '1' -PropertyType 'DWord' -Force | Out-Null

New-ItemProperty -path 'HKLM:\SOFTWARE\WOW6432Node\Microsoft\.NetFramework\v4.0.30319' -name 'SystemDefaultTlsVersions' -value '1' -PropertyType 'DWord' -Force | Out-Null
Step 5: Configure the Journaling Mailbox in Archiver
Follow the steps listed in Configuring a Journaling Mailbox while keeping the following note about passwords in mind. In addition, these are the precise steps to configure the Journal Mailbox:
- Connect using - EWS
- Login - Enter the full O365 journal mailbox address e.g. username@domain.com
-
Password - Enter the password of the journal mailbox in the format:
[password]_@oAuthCoxn_[ClientID](underscore included), where- [password] is the correct journal mailbox password
- [ClientID] is the OAuth ClientID obtained when registering GFI Archiver as an OAuth client app in Microsoft 365
- Please make sure to enter the password and ClientID without the brackets "[ ]"
- Tenant ID - From step 1
- Client ID - From step 1
- Client Secret - From step 1; enter as
<SecretId>_@ClientSecret_<clientSecret>(or<clientId>_@ClientSecret_<clientSecret>) - Folder - Use the language of your mailbox (e.g. Inbox for English or Posteingang for German) or just enter [INBOX]
- Exchange Server Host - Use Manual Host to Exchange/Office 365 CAS option with the URL:
EWS passwords (in GFI Archiver for DataSources, Import/Export, and Folder Sync) should be set using the format below for OAuth Authentication via EWS.
[password]_@oAuthCoxn_[ClientID] (underscore included)
Where [password] is the user's password (as before). Please make sure to enter the password without the brackets "[ ]"
And the [ClientID] is the OAuth ClientID obtained when registering GFI Archiver as an OAuth client app in Microsoft 365 (in step 1). As with the password, please make sure to enter the ClientID without the brackets "[ ]"
Important Note 2:It may be necessary to unblock or whitelist microsoftazuread-sso.com in order for Archvier to successfully authenticate the Journaling Mailbox in Microsoft 365.
Priyanka Bhotika
Comments
Juergen Koel
For anyone getting a 403 error, take a look here
https://support.archiver.gfi.com/en-us/article/106483-registering-archiver-in-azure-portal
There is one more permission under API permissions.
Nathan Schroeder
I'm having the same problem. Created a ticket - no answers yet from GFI. However, Microsoft did make a change to the EWS settings - https://techcommunity.microsoft.com/blog/exchange/the-way-to-control-ews-usage-in-exchange-online-is-changing/4383083
Catty Admin
Add me to the list with this problem and lack of support. Frustrating to say the least! We've been having this issue since Monday! No emails are being archived.
Michelle Donnelly
i'm having the same issue and raised a ticket on Monday with no response!!
Paul Van de Weem
Where are Steps 2 - 5?